Preparing the Song
Song List and Editor Settings
First step in preparing a track is to open the editor. If this is your first time, open the settings menu and select your desired resolution as well as where you would like your beatmaps to be stored by selecting a directory.
We then want to come back to the Song List View and click the Plus button on the left to start importing our first song.
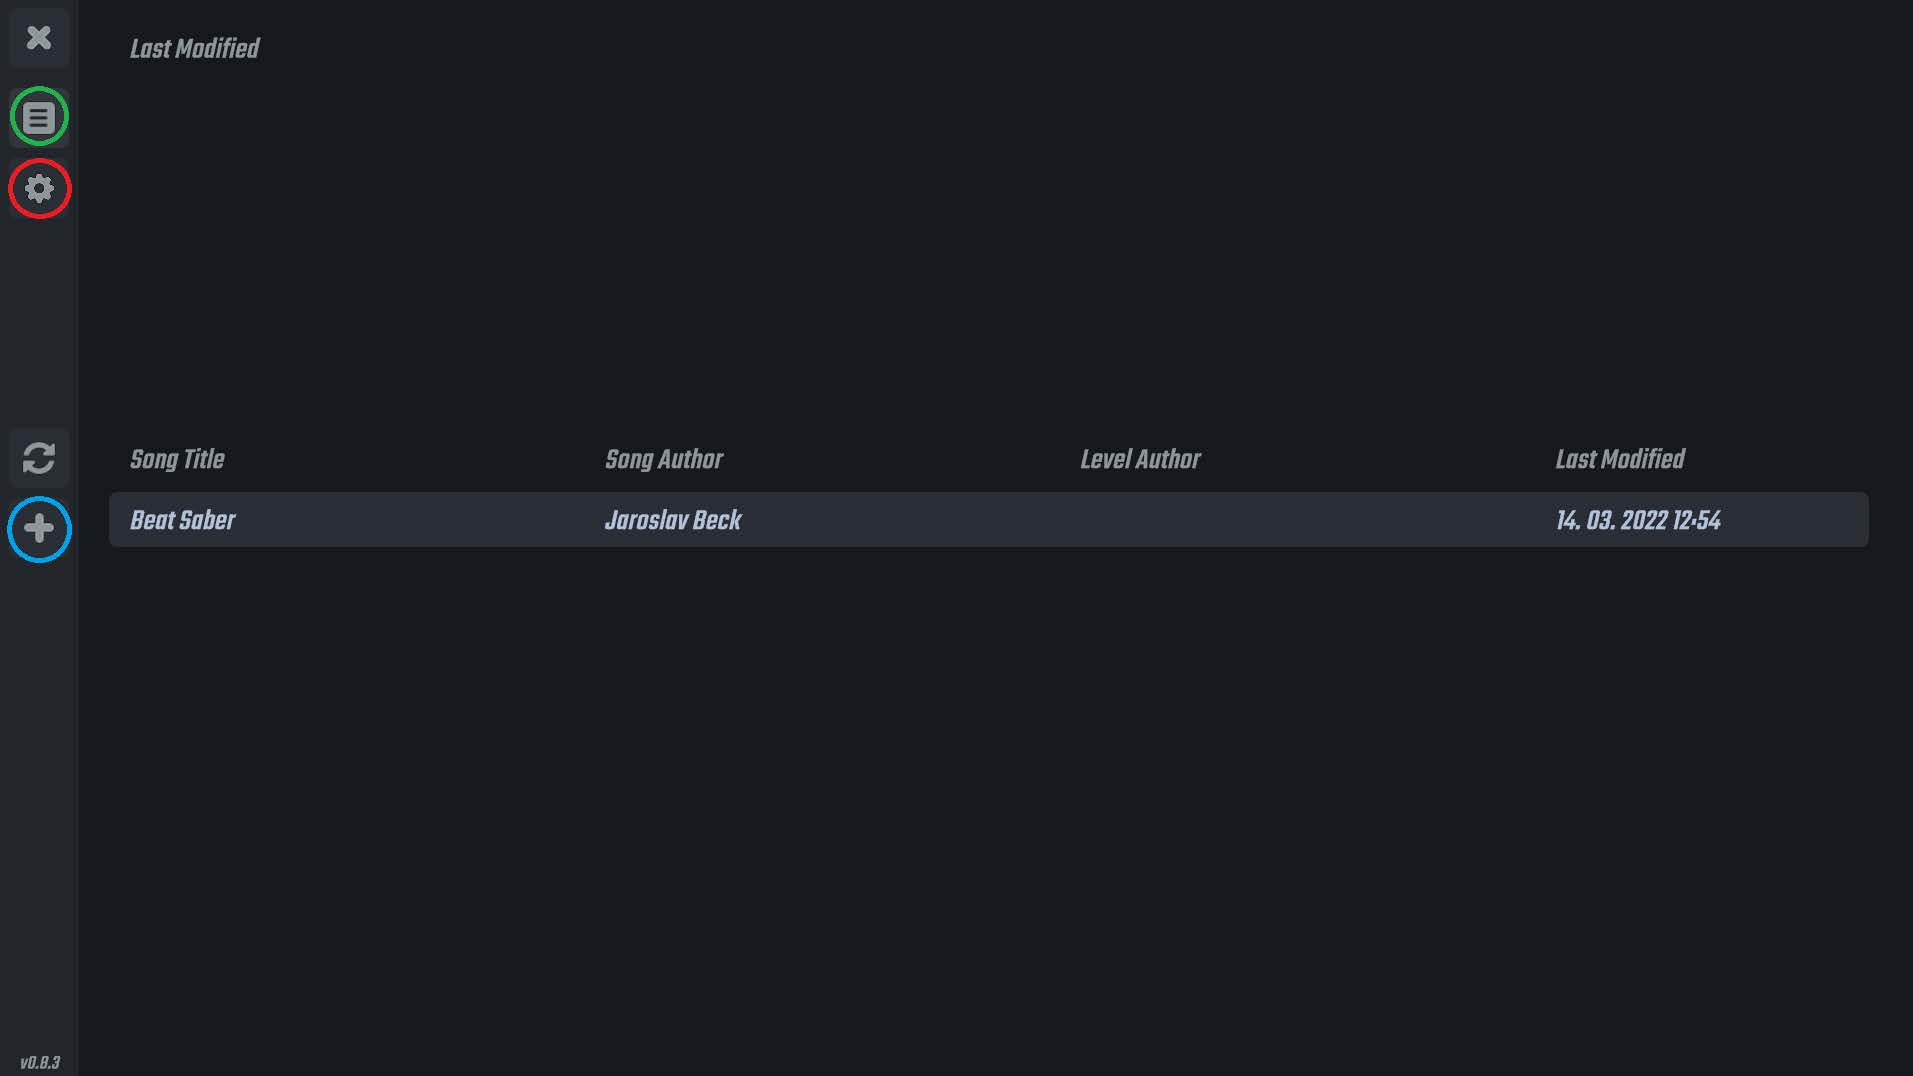
| Quit | Quits the Editor |
| Song List | Clicking this button will take you to the list of songs in your map directory (The image above shows the song list view) |
| Settings | Settings allows you to change the resolution of the editor and also where the directory of your beatmaps are located. |
| Refresh | Simply refreshes the song list page |
| New Song | Clicking this + button will start the process of importing an audio file and preparing a new map. |
Song Creation and Audio Import
After opening the import song section, fill in the song name, the custom beatmap name and the BPM. Then click the folder icon and select the audio file that's located on your computer. The editor will automatically move that song file to the directory chosen under your settings menu.
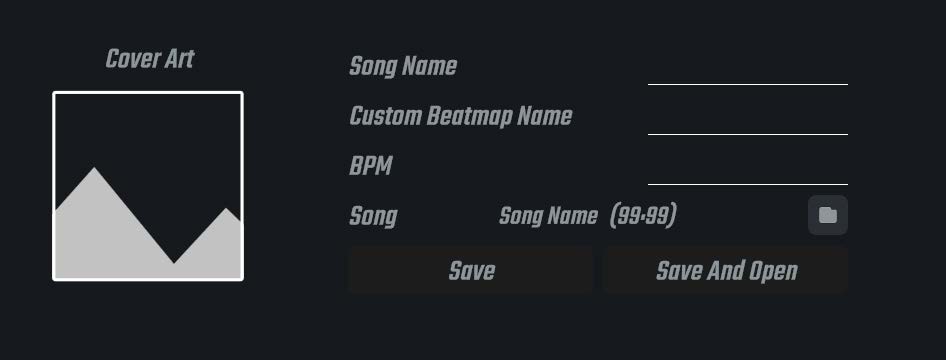
| Song Name | Title of the song. eg; 'Beat Saber' |
| Custom Beatmap Name | What you would like the Folder that's generated to be called. eg; 'Beat_Saber_2018 |
| BPM | The song's BPM (Beats Per Minute) |
| Song / Song Name | Click the folder Icon on the right to import an audio file. The Editor support .wav and .ogg files |
| Save | Saves the information and returns you to the song list. |
| Save and Open | Saves the information and opens the song settings menu |
Song Settings (Difficulties, Modes, Environment choice)
On the Song Settings screen, we need to fill in a bit more information about the song including what environment we want to use for the song as well as what difficulties and modes we want made for the level.
Cover Art, Song Sub name, level Author Name, Preview Start Time, Preview Duration, Song Time offset are not necessary for a level to work. They are just some additional fields if you would like to polish the chart with some extra metadata.
Look at the image and table on the right for more information of what everything on this screen means.
Note: If you select an environment, then start creating lights for it and then want to change the environment to a different one later, there will be incompatibilities and you may lose progress on your lights. It's best to decide exactly what environment you want to be using at this point in time before you ever start making lights.
Once you have filled in the information you would like to fill in, Click the Plus button next to the difficulty and under the mode you would like to start on. For a first timer, it's best to select one of the difficulties underneath the 'Standard' game mode.
When you click the plus button, it will change into some new fields including Jump Speed, Spawn Offset and a new Button to click.
The Jump Speed and Spawn Offset can be changed at any point, so for now leave the values at 0 in both fields and click on the new Button that has appeared (Square with an arrow), which will take you into the Editor itself.
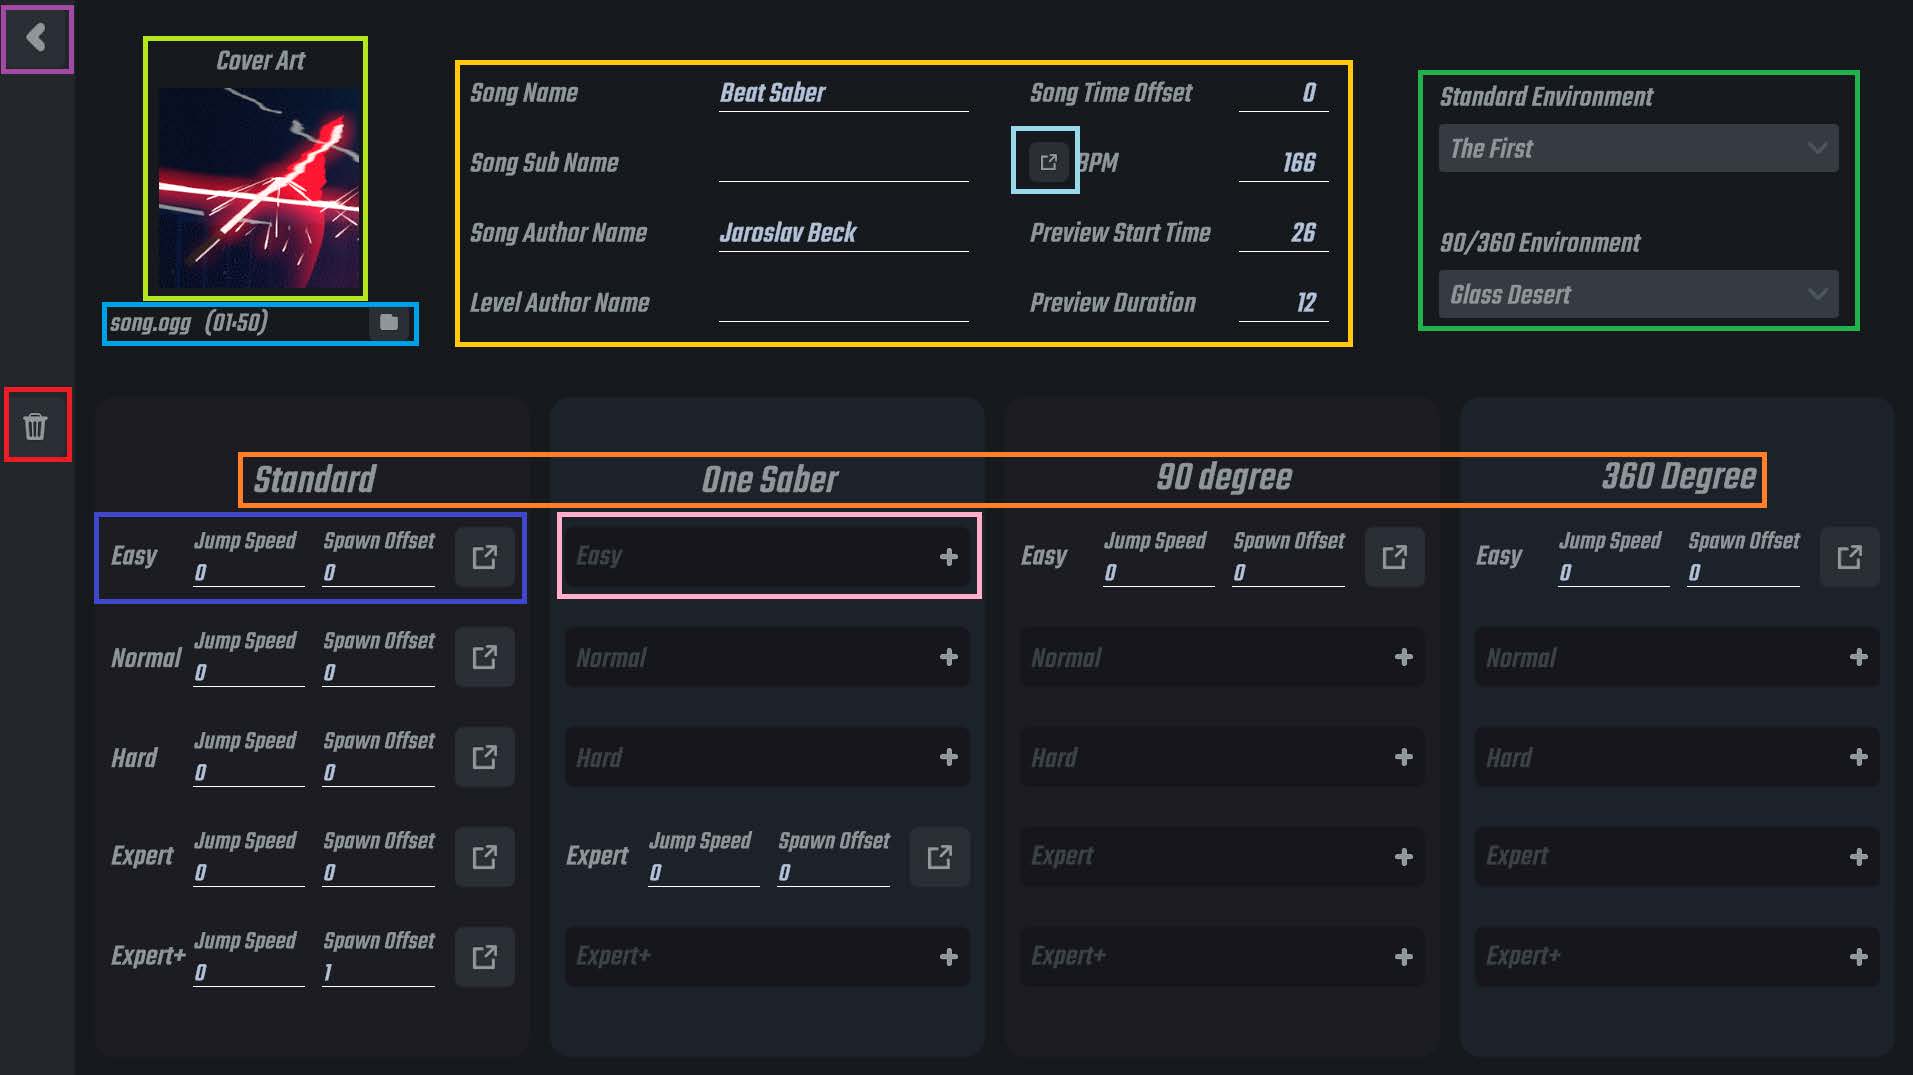
| Back | Takes you back to the song view |
| Cover Art | Clicking this image/area will open a file browser so you can select the cover art you would like displayed next to the song in the game. The Cover Image needs to be Square (Identical width and height) as well as a minimum of 256 x 256 resolution. The Image format should be .png |
| Audio File | You can change/update the audio file by clicking the folder icon here |
| Song Name | The title of the song. example ; 'Country Rounds' |
| Song Sub Name | The subtitle of the song. Displayed next to the Song Name text but in a smaller font. example ; ft Sqeepo remix |
| Song Author Name | The artist of the song. example ; 'Jaroslav Beck' |
| Level Author Name | The mapper. example ; 'Freeek' |
| Song Time Offset | A number (in seconds) that delays when the audio starts in relation to the beatmap. |
| BPM | The song's BPM (Beats Per Minute). Clicking the Icon next to the BPM text will open the BPM Edit Tool. |
| Preview Start Time | This field allows the mapper to choose what part of the song the preview starts at. |
| Preview Duration | Allows the mapper to choose how long the preview plays for. |
| Standard Environment | From the drop down list, you can choose what environment this song will play on when playing Standard or One saber modes |
| 90/360 Environment | From the drop down list, you can choose what environment this song will play on when playing 90 or 360 modes |
| Delete Map | Deletes your map entirely. |
| Mode | The settings beneath each title correspond to that mode. Standard, One Saber, 90, 360 |
| Difficulty | The settings beside each title correspond to that difficulty. Easy, Normal, Hard, Expert, Expert+ |
| Jump Speed | The NJS - How fast the notes arrive to the player. Leave at 0 for default speeds |
| Spawn Offset | Choose how far or close the notes 'spawn' in front of the player. Leave at 0 for default distances |
| Edit Map Button | Click the Button to open that selected difficulty / mode in the editor. |
| New Map | If no map has been created for a certain difficulty / mode combo, clicking this + button will generate the necessary files. When creating a map for the first time, every single field on this screen will be blank and you will have to click one of the plus buttons. |